
Is it possible to Build an online store in less than 1 hour? Here I can tell you that it is possible and very simple to build an online store within 1 hour using WordPress.
Building Online stores are now very essential to becoming a part of this digital era. It helps to boost your business and reach your targeted global audience. So in this tutorial, I can guide you on how to build an online store within 1 hour.
Table of contents
What You’ll Need To Build an Online Store in Less than 1 Hour
Building an online store is not a much difficult process. There are several variables to consider, such as domain & hosting, WordPress and WordPress themes, and WooCommerce plugins.
Domain & Hosting
Choosing the right domain & hosting is the first step in building your website. You can use a free domain provided by WordPress or purchase one separately. You will also need to select the hosting for your site as well as the web design business that will construct your website design.
Hostinger is a web host that charges reasonably while providing many services. All necessary features, including cloud hosting options, are provided for users. For those who are unconcerned about downtown, it is a perfect choice.
Hostinger is simple to use and focuses on WordPress onboarding, offering a quick and easy setup for newcomers. Hostinger provides a one-click WordPress setup. It updates WordPress automatically, allowing you to get your site up and running quickly.
You can easily manage your website in terms of web hosting, free backups, free SSL, and domain administration. Hostinger’s starting plans are heavily discounted for new clients. And, the renewal plans are also budget-friendly. Overall, it’s one of the best options you can go with.
WordPress and WordPress theme
The second step is installing WordPress and locating a theme that is appropriate for your shop. You might want to focus your search by reading internet reviews or looking at what other shops are employing because there are so many distinct themes on the market.
After selecting a theme, you must install it on your WordPress website. You may do this via FTP or cPanel.WordPress is a very popular platform for blogs, portfolio websites, company websites, eCommerce sites, and many other types of websites. For the following reasons:
- The WordPress community has created dozens of themes and plugins that may be used to modify your site, including several eCommerce capabilities.
- WordPress offers great security. To tackle recent dangers, it provides routinely new updates and patches. Furthermore, increased site security is significant for eCommerce businesses.
- In this article, we will use the Astra WordPress theme to create an eCommerce store.
To make this tutorial I have used Astra theme.
WooCommerce
Now, comes the main section of building an online store. Among so many plugins for eCommerce sites, WooCommerce is the best for good reasons. We’ll go through the fundamentals of WooCommerce and how it may assist you in setting up your online store.
WooCommerce is a free and open-source eCommerce platform developed by WordPress and WooThemes. It has been downloaded over 28 million times since its debut in 2011. It has so many features that it can be used for any type of shop. Some of these characteristics are:
- Selling physical and digital things
- Customization of the design
- Customizable checkout procedure
- The usage of payment gateways such as PayPal and Stripe
Installation of WordPress using Hostinger Panel
Here’s the simple step to use Hostinger’s Auto Installer:
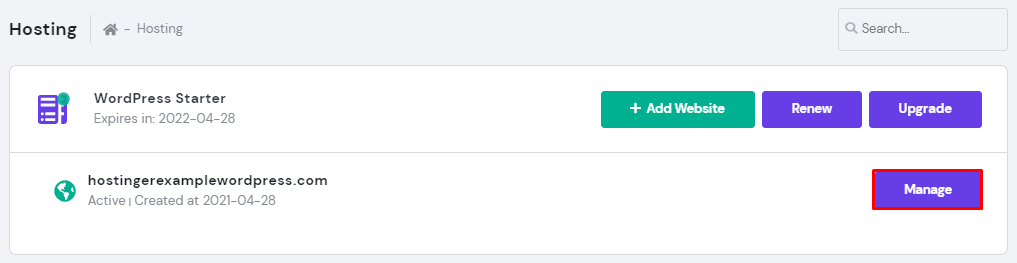
- Log in to your web hosting account and select Hosting from the main menu.

- Select the Domain Name for your brand-new WordPress website, then click Manage to access your hPanel.
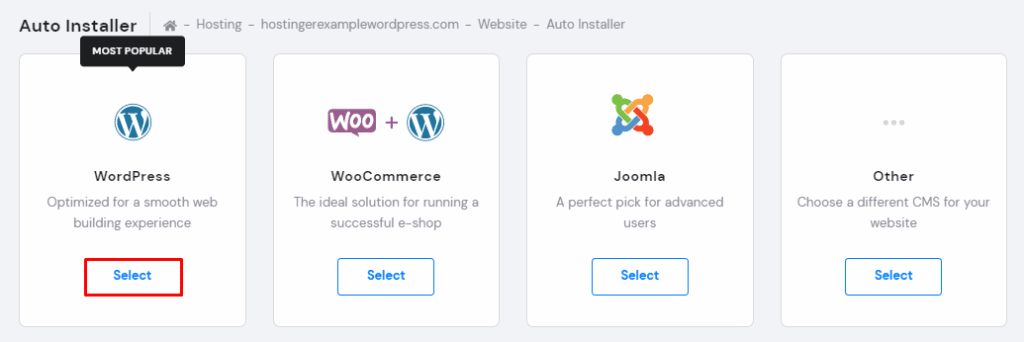
- In the Website area of your hPanel Dashboard, look for the Auto Installer button.

- Choose WordPress and press the Select button under Auto Installer.
Now, Fill up the Install WordPress form as per the given steps.
- Check your custom domain name for the word “WordPress” next to it.
- The Administrator Username, Password, and Email are used to log in to WordPress. They do not have to be the same as the web hosting login credentials. To prevent security breaches, pick a strong password.
- Make a title for your WordPress site.
- Select your language preference.
- For automatic updates, select the Always update to the latest available version option.

Hit the Install button, after filling out the required information in the form.
- Hostinger will display Installed Applications. Select the three dots next to your WordPress URL. To access My WordPress Dashboard, select Manage.

- To access WordPress Administration Dashboard on the WordPress Dashboard, tap the Edit Website button.

- Another approach to reaching the WordPress Admin Dashboard is to click the Dashboard button under WordPress on hPanel.
How to install Astra Theme in WordPress
Follow the below-given steps to install Astra theme on your site.
- Access your WordPress Dashboard by logging in.
- Navigate to Appearance > Themes > Add New and look for “Astra”
- Install Astra and activate it

Note: You need the zip file of the Astra Theme in case you want to manually install the Astra theme. You can download it from the WordPress Repository here.
How to install Woocommerce in WordPress with Astra Theme
Step 1: Install WooCommerce
If this is your first time creating an online store, we recommend starting by installing WordPress with the default theme and no plugins. This will reduce the likelihood of WooCommerce compatibility difficulties in the long term.
The first step is to download and install the WooCommerce plugin. It is available for free download from the WordPress repository and may be posted directly to your WordPress site.
To install it directly on your site, log in to your WordPress dashboard, navigate to the Plugins page, and click Add New. Add the keyword ‘WooCommerce‘ to the search field.
When the plugin appears, click Install Now. As shown in the screenshot below, the plugin’s creator should be Automatic:

Click on the Activate button as soon as it’s ready. WooCommerce will launch the configuration wizard after the completion of the process.
Step 2: Access the Setup Wizard
The wizard will assist you in configuring your store’s important parameters. Allow the wizard to be your guide. It is optional, however, we urge that you go through these preliminary steps to set up the critical setting in your store.
The setup wizard begins with some basic inquiries about your shop on the first page:

You must enter some essential information. This information includes your store’s address, nationality, and if you’re setting up for a client.
You should keep in mind that whatever you put up using the wizard can be altered later on the WooCommerce settings page if required.
Step 3: Choose the Industry
You should enter the sector your store serves here and then press “Continue.”

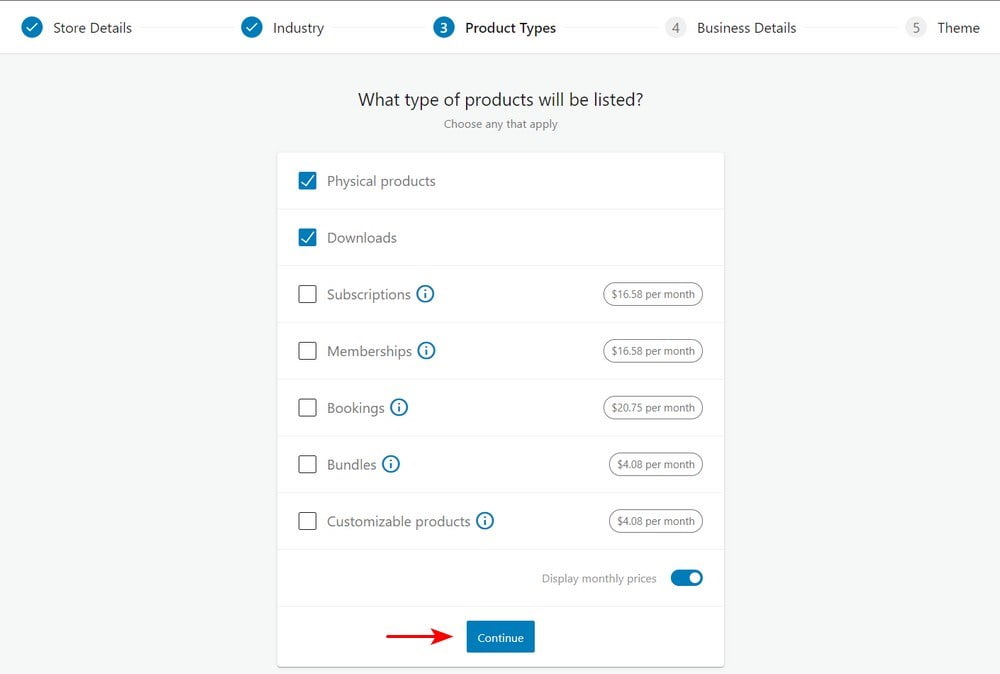
Step 4: Choose the Product Type
The next step is to determine whether you want to offer digital or physical things.
You can also pay an additional fee if you want subscriptions, memberships, reservations, packages, or bespoke items. They are only available as premium:
Step 5: Business Details
You must fill out the following page with information about your company. Choose how many items you want to display.
In addition, you must include any additional platforms where you offer your goods:

Following that, you’ll be offered a few optional add-ons, as shown above. These tools are useful, but none of them is essential to managing your eCommerce shop.
Step 6: Choose the Theme
The next step is to select a theme for displaying your items. There are several WordPress themes available for free and paid.
We propose that you download the Astra theme or buy the Astra pro theme and then upload it in this section:

After uploading it, tap on the ‘choose’ button.

Astra is created by Brainstorm Force, a company that has been around for more than 10 years.
Due to its great customer assistance, the theme has received over 1 million downloads and a steady 5-star rating. This theme stands out due to its seamless integration with website builders, quick loading time, and abundance of top-notch templates.
The Ultimate Add-ons for Beaver Builder and Ultimate Add-ons for Elementor plugin extensions, which are excellent for online retailers, has just been released. It perfectly connects with page builders like Beaver Builder, WPBakery Page Builder, Thrive,s Architect, Elementor, Divi Builder, Brizy, and Gutenberg.

The screenshot shows that the setup isn’t finished. You must now add items, set up payments, set up tax, and enter delivery information.
Step 8: Add Products
You can manually enter products, import them, or migrate them.

Since this is your first store, we advise manually adding the goods. You must now configure every aspect of the product.
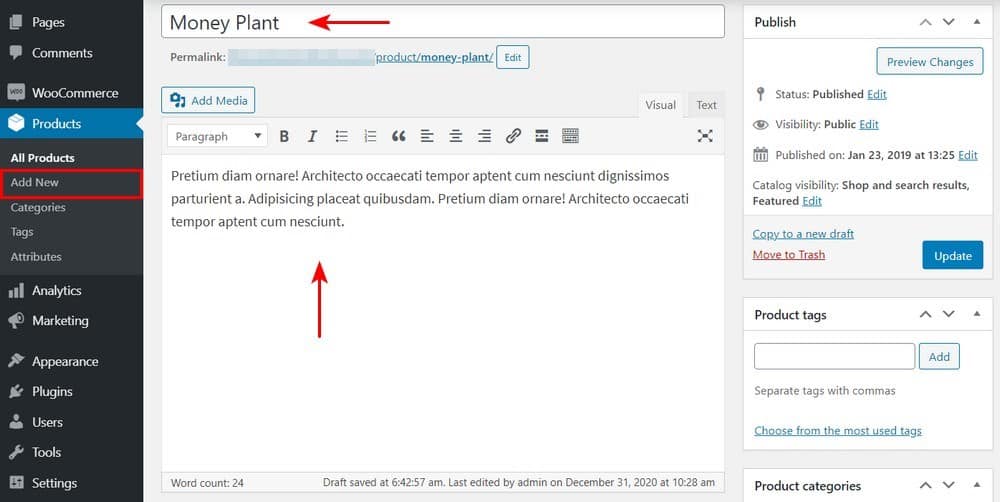
Add the Title and Description of the Product
In the title section, type the name. Following that, you must include a detailed description of the product’s characteristics and benefits.
Choose the Product Type
Depending on what you are selling, you can choose a variety of products. You may select from a variety of product kinds by default with WooCommerce. It provides four basic product categories.
They are:
- Simple products
- Grouped products
- External or affiliate products
- Variable products
There are two more options to modify the four core product types:
- Virtual – If you are selling an online digital product that does not require shipping, use this option.
- Downloadable – If the downloaded file is related to the product, enable this option.
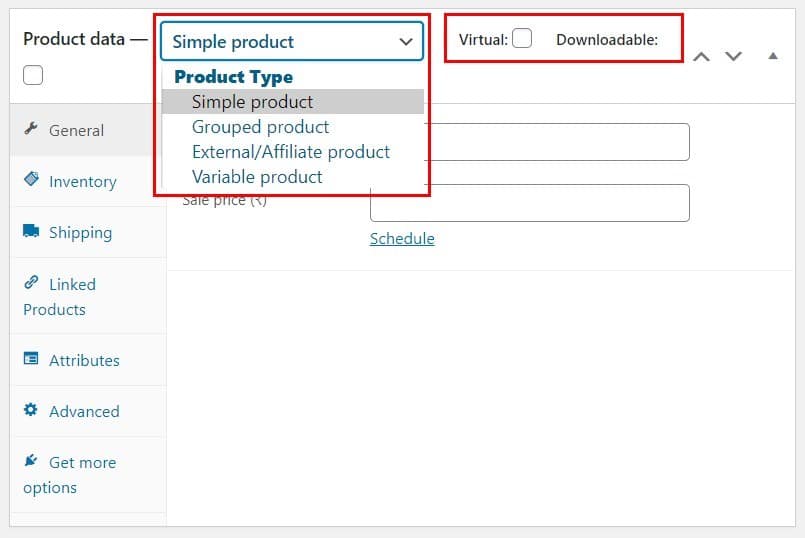
Complete the remaining fields in the Product data box after choosing the product type. When entering the product data, utilize the tabs on the left to switch between sections according to the requirements of your business.
Step 9: Set up Payments
Return to WooCommerce > Home once you have uploaded all of your items. Select “Set up payments.”

You must choose the payment processor you want your store to utilize.

Alternatively, you may configure your payment choices by navigating to WooCommerce > Settings > Payments.

WooCommerce supports many payment gateways. Select the one that best fits your needs.
Step 10: Set up Shipping
Returning to WooCommerce > Home, and tap on ‘Set up shipping‘:

Then, add the shipping cost.

The shipping cost is determined by the zones you wish to serve and the items you intend to sell. If you are unsure about the shipping fees, we recommend that you verify the prices at your local post office. These parameters can also be changed afterwards.
Step 11: Set up Tax
Visit WooCommerce > Home, and select ‘Set up tax‘:
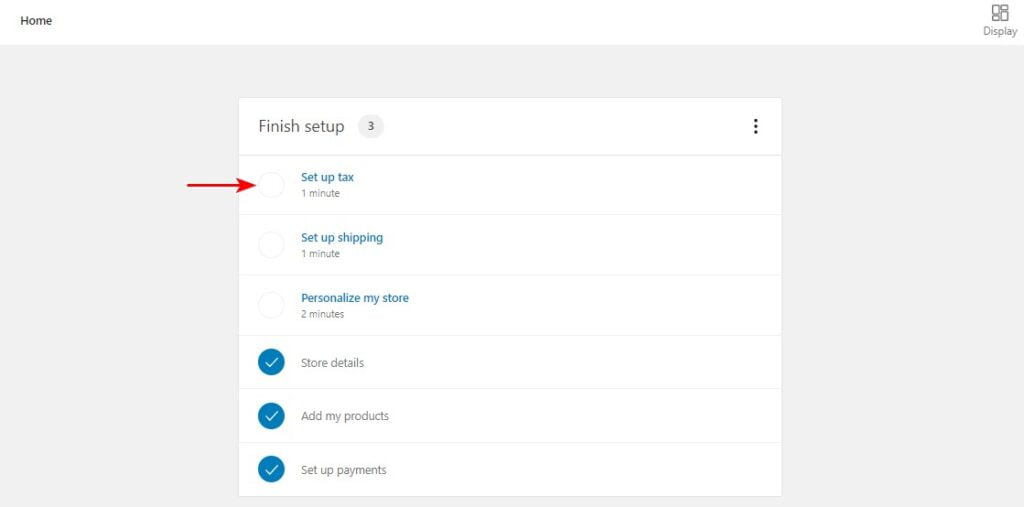
Click on ‘Configure‘:

Create a new row and provide the necessary tax information. Remember to click ‘Save changes’ when you have done.

Step 12: Check That WooCommerce Is Configured Correctly
You’ve completed all of the steps required to launch a WooCommerce store. Before you begin customizing your business, ensure that everything is in working order.
WooCommerce provides multiple pages for your store by default. They include the Shop, Shopping Cart, and Checkout pages:

You should be aware that this is a basic WooCommerce installation. Before you can start selling your goods, there is still a lot of work to be done.
Go to the WooCommerce > Settings screen to make more changes to your WooCommerce settings. You have the opportunity to modify your tax, shipping, payment, and email preferences.
Conclusion :
Starting an online store may be a difficult endeavor for novice entrepreneurs. They might not know where to begin, what to do, or how to accomplish it. If you are seeking the best guidance on how to build an online store in less than 1 hour, this post is for you.
We hope this article will help you with all the information that you need to launch your eCommerce website in less than an hour. Please share it to make others aware of building an online store in less than 1 hour.